Glattleder
Dieser Begriff umfasst nicht nur wirklich glattes Leder sondern auch geprägte Leder wie Scotch- und Pin Grain, gelaserte Leder (mit Hilfe eines Laserstrahls gravierte Leder), Kalbsleder usw. – kurzum alle Leder, die nicht zu den Rau- und Nubukledern, den angeschliffenen Lederarten gehören.
Fettleder und Shell Cordovan, nicht zu verwechseln mit Pferdeleder wie es leider so oft getan wird, bedürfen einer besonderen Pflegemethode.
Es würde allerdings den Rahmen dieser Abhandlung sprengen wenn ich auf alle besonderen Ledersorten und -arten eingehen würde.
Im Zweifelsfall schicken Sie mir einfach eine E-Mail.
Eine Einführung
Nachdem Sie die Schnürsenkel herausgezogen und die Schuhspanner eingelegt haben bürsten Sie den Schuh kurz ab und achten dabei bitte darauf auch die Beuge von Schaft und Sohle gründlich abzubürsten;
aber keinen großen Druck auf die Bürste ausüben – lassen Sie deren Borsten für sich arbeiten.
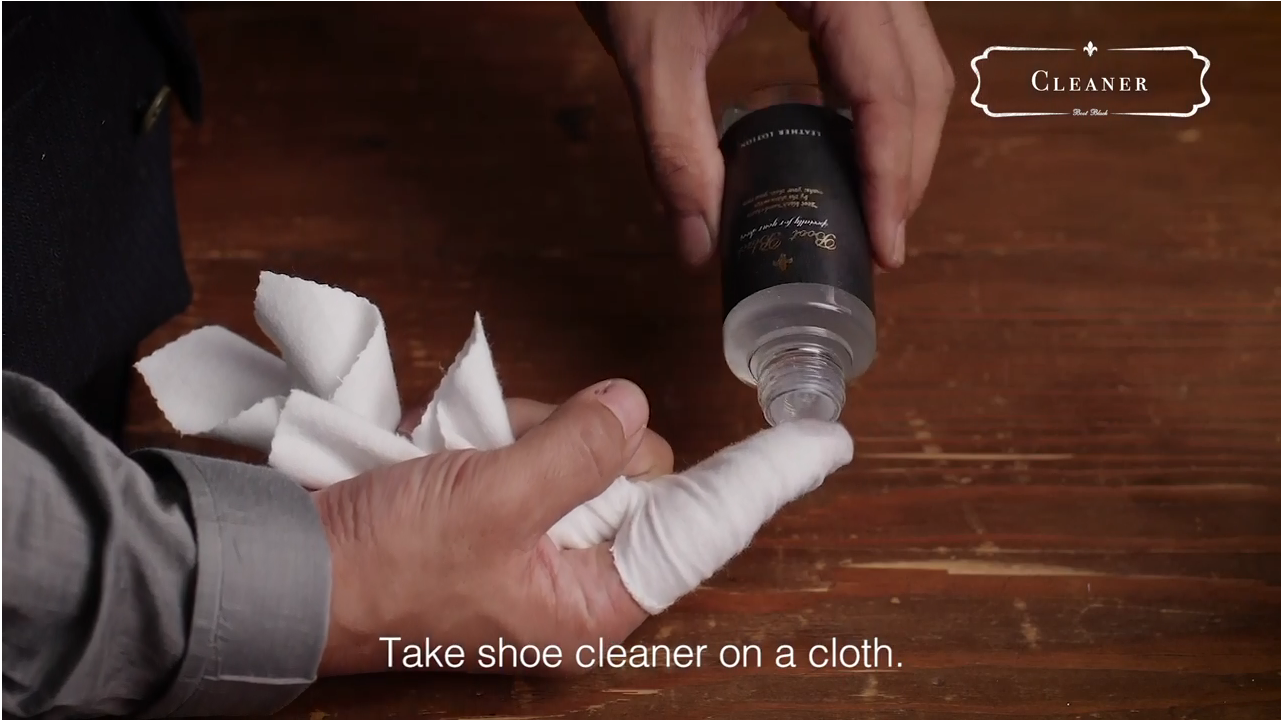
Danach legen Sie das Baumwolltuch, entweder ein Polish Cloth oder ein Stück von einem alten T-Shirt (aber bitte ohne Nähte), um den Zeigefinger, verdrehen es auf dem Handrücken und halten es in der Daumenbeuge fest.
Anschließend tröpfeln Sie etwas Lederreiniger auf das Tuch und reiben damit die Schuhe ab – dabei wechseln Sie öfters die verschmutzte Stelle des Tuches.
Sobald Sie einen Schuh, oder beide, abgerieben haben stellen Sie sie hin
und tun nichts!
What you need
shoe brush
cotton cloth
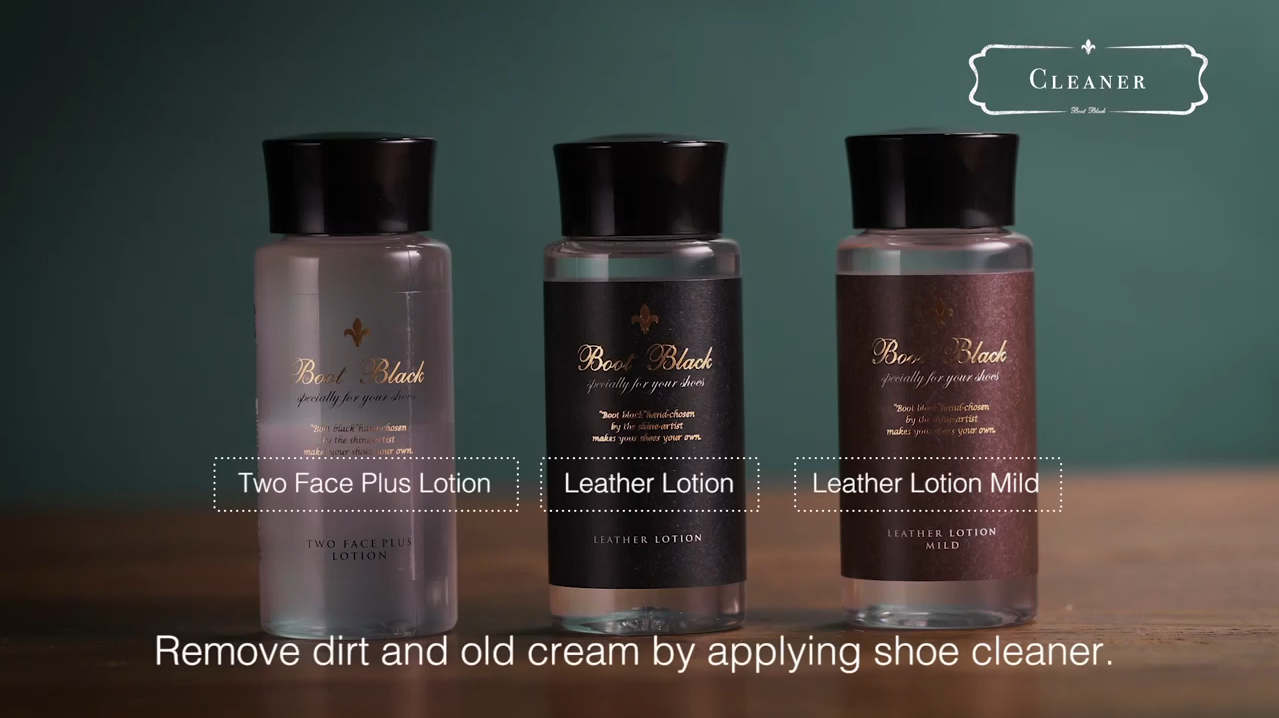
leather cleaner
shoe polish
polishing brush
Time
10-15 minutes
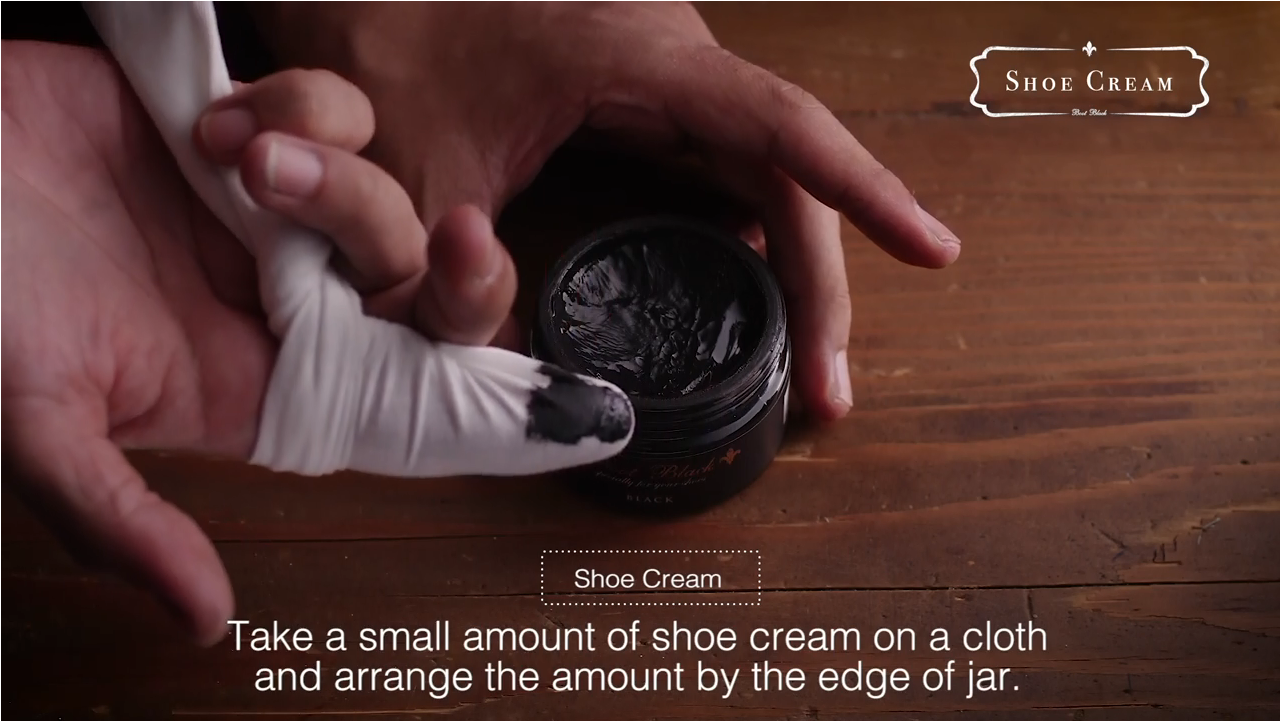
Then change the position of the cotton cloth on your index finger and take a very small drop of shoe polish with it.
Rub these in offset circles on the leather; only when nothing else happens, then apply some shoe polish a second time.
Continue in this way until the entire shoe upper has been treated with cream.
Then put some cream on the second shoe.
Then dab briefly with one finger on the shoe first treated – the shoe polish no longer sticks, then you can polish it with a shoe polish brush, or with your flat hand.
Grip the shoe breasts only with your thumb and index finger in the recessed grips on the sides and control the brush with your middle finger.
Let the brush touch the shoe only slightly!
Shoe polish with a brush does not mean to grasp the brush with the whole hand, to press and to scrub off the shoe!
Let the brush level the wax layer on the leather in different directions, smooth it and bring it to a shine.
Please don’t forget!
You can also polish shoes up again – so you don’t have to put new cream on them every time you wear them.
Depending on how thick the wax layer is, each shoe should be polished at least 2 or 3 times.

You can polish your shoes with a shoe wax like the Shoe Polish or a polish like the High-Shine Coat.
You can also apply one or two additional layers of shoe polish to shoes that have already been polished – this way the wax layer on the leather becomes a touch thicker and gives it more shine.
Apply the shoe wax in offset circles, rub the wax on the cotton cloth completely…
Same process as with shoe polish.
Polish in both X-directions and the shoes shine!
The ultimate high gloss on toes and around the heel is achieved by applying a colourless shoe wax or High-Shine Coat in Neutral and polishing with Polish Water.